


Before going further, I need to tell you a little bit of my background.
This month, I completed 5 years in content/growth marketing, and I have a Bachelor’s in Computer Science Engineering from one of the top 10 colleges in my state. It’s been almost 5.5 to 6 years since I last programmed anything. In fact, I’ve never actually developed anything during my college days. I wrote about my journey on how I joined Zoho as a content writer a few years back.
Enough of my background. Now, I’ll give you the context of this blog.
At Requestly, where I’m currently handling the Growth team, we decided to spend a day exploring AI and how it can influence our productivity. We were tasked to either build or find a good AI tool and had a “demo hour” where we showcased what we built/found.
Unsurprisingly, many of my colleagues found a lot of useful tools that can actually improve how we function at Requestly. A few tools I would like to mention here are writemyPRD, yoodli, and reword. I found these tools very interesting, and you all should give them a try.
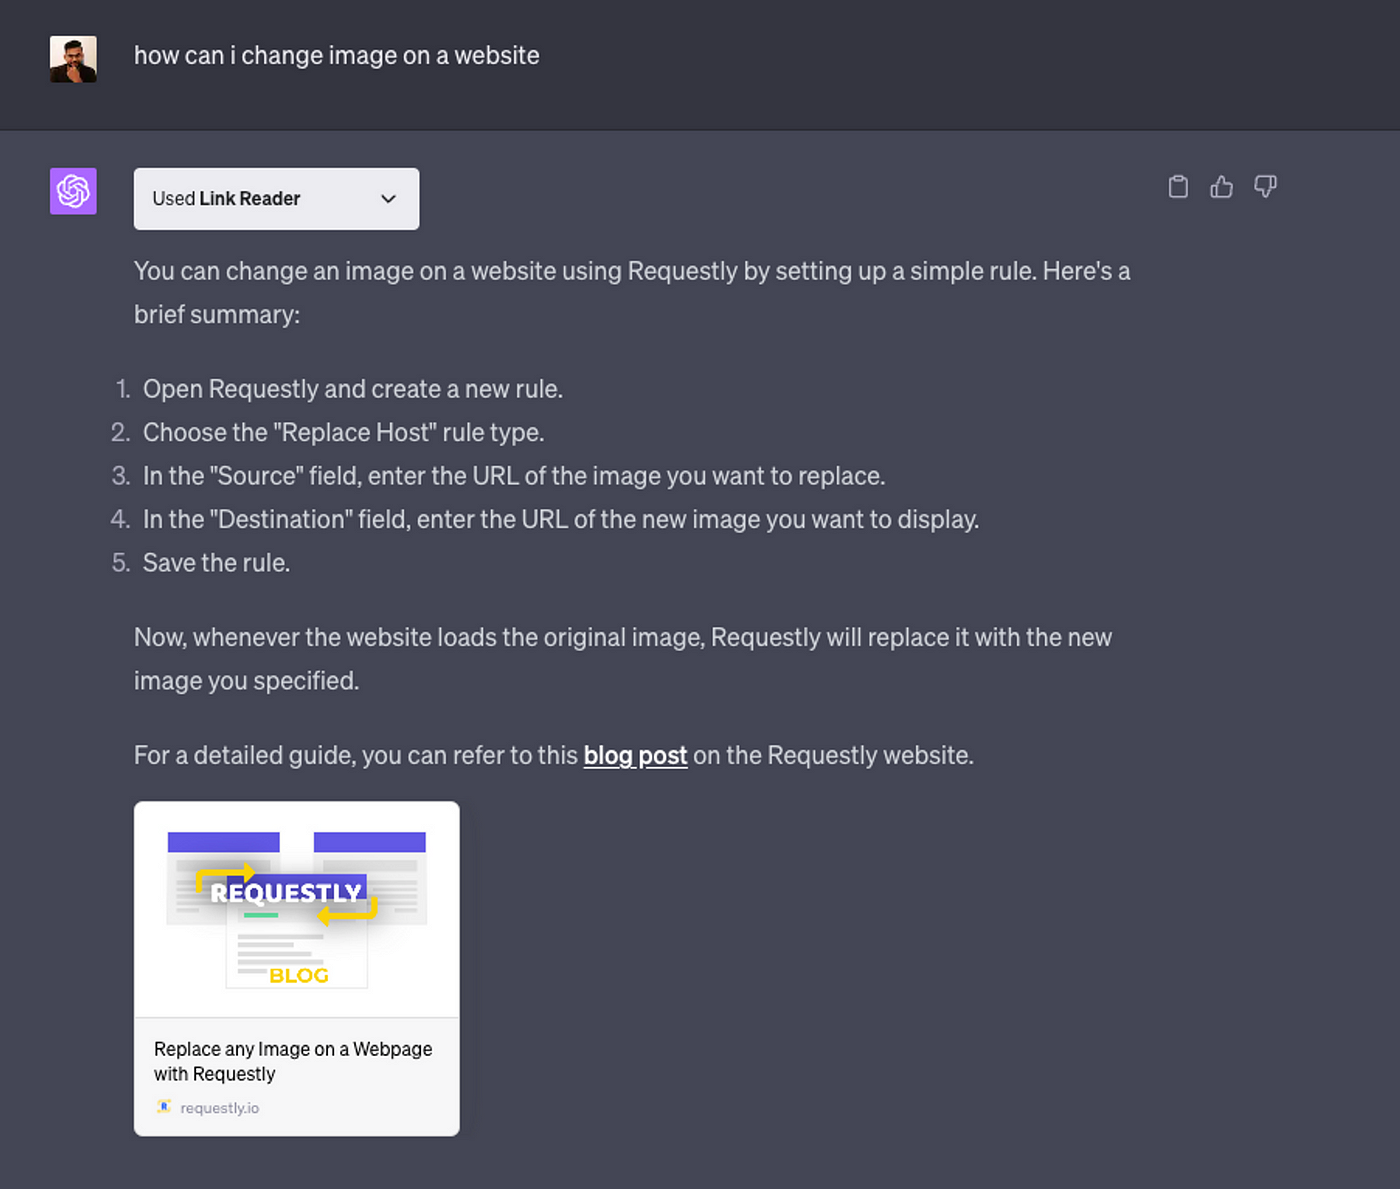
Now, I had way too many ideas on my mind that I wasn’t sure which one I should explore. Then, I finally settled down with the idea of building a ChatGPT module within our blogs and products. While I was exploring ChatGPT, I found this plugin called LinkReader that helps ChatGPT to read all the content within a given URL.
(P.S. This plugin was not available by the time I published this article! One more reason for me to be glad that I built this tool )
I wanted to build a similar tool that can read the content we have already published and provide a summary of the questions asked with a link to the relevant page. As a guy who can’t actually build, I just turned to ChatGPT itself to build an in-house ChatGPT.
It’s all about prompts!
Initially, I didn’t even know where to start and couldn’t find heads or tails of it. I started with building a link scrapper, so I went to ChatGPT and asked it to build me the scrapper by itself. It gave me a code that I didn’t even know how to run it!!
I went back to the basics. I tried to learn what Python Flask is, how to install Python on my Mac and how to run Python scripts. Gathered some ideas, installed Python and ran the script.
Boom! ran into something that every developer treads.
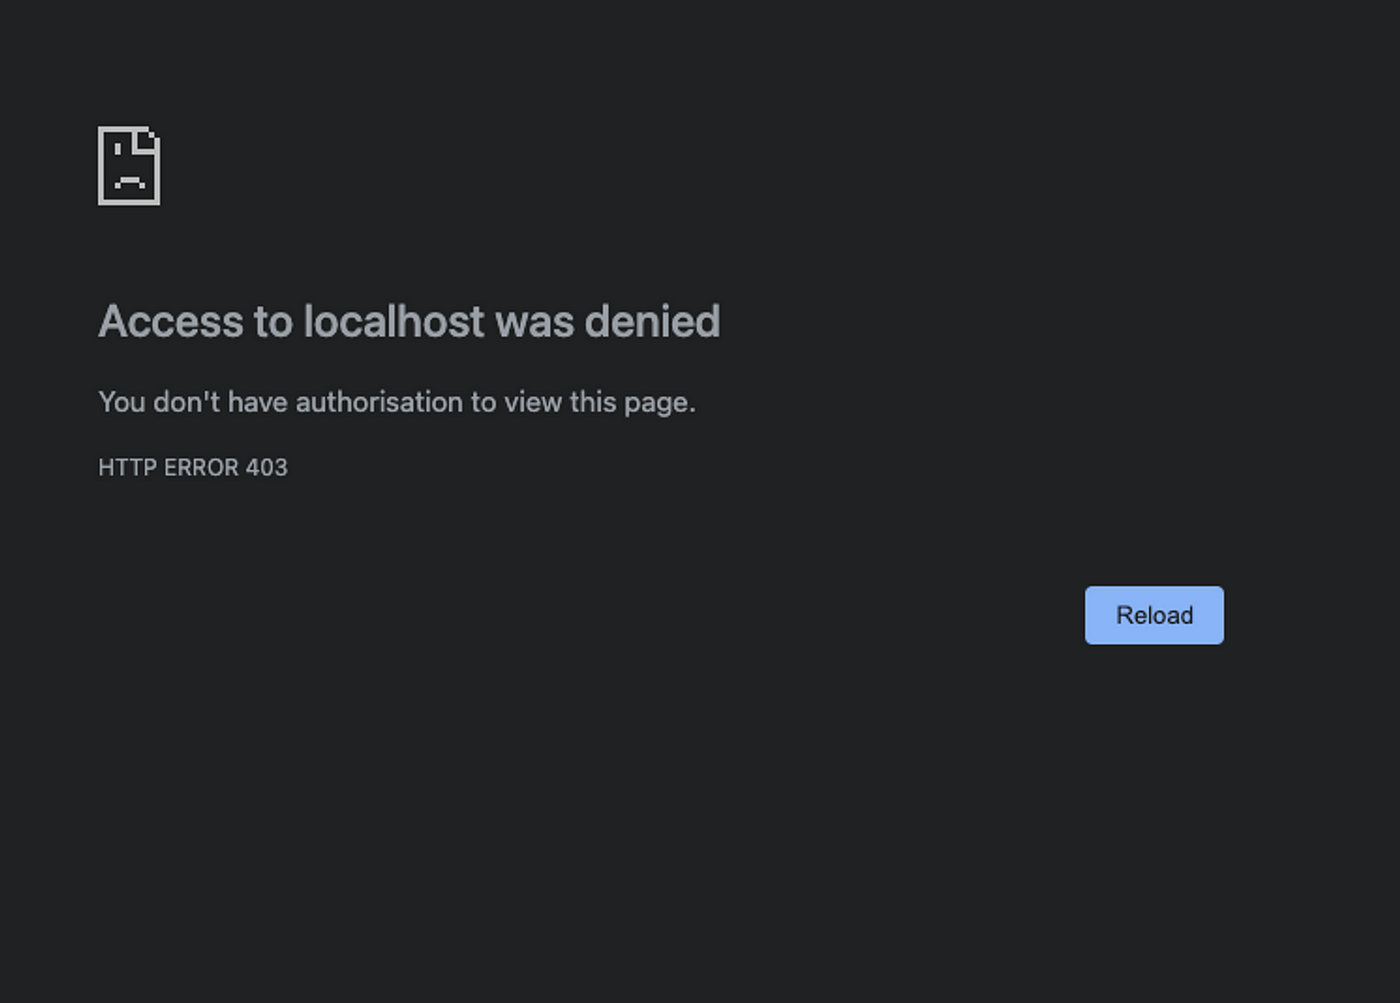
I had to call in some Air Support to clear out the buggies. My Co-founders and colleagues: Sagar, Sahil, and Rohan, were kind enough to get on a huddle with me and found that the port I was trying to call was used by some other tool, and that’s why Localhost wasn’t loading. While exploring this, I learned methods for identifying which tools are utilizing specific ports. You can also learn it from here.
My objective was to build a tool that can answer questions based on the URL I’m giving. Again, I turned to ChatGPT, and it advised me to go with Python Flask. I stayed with Bootstrap as the front end because I had experience in building basic web pages earlier. I named the app Vina as it means “question” in Tamil.
Reading all the content in a given URL will require a combination of different libraries, such as requests to handle the HTTP requests and beautifulsoup4 or lxml to parse the HTML content. So let me walk you through the process of creating the Vina app.
Step 1: Fetch and Parse Web Content
You will first need to fetch and parse the web content. This is how the code will look like:
import requests
from bs4 import BeautifulSoup

def fetch_webpage(url):
    response = requests.get(url)
    return response.text
def parse_webpage(html_content):
    soup = BeautifulSoup(html_content, 'html.parser')
    return soup
def extract_content(soup):
    text = ' '.join(soup.stripped_strings)
    return text
def main(url):
    html_content = fetch_webpage(url)
    soup = parse_webpage(html_content)
    text = extract_content(soup)
    print(text)
if __name__ == '__main__':
    main('<https://example.com>')
The fetch_webpage function takes a URL and returns the HTML content of that page as a string. The parse_webpage function takes HTML content and returns a BeautifulSoup object that you can use to navigate the HTML tree. The extract_content function takes a BeautifulSoup object and returns a string with all the text on the page. The main function ties everything together. It fetches the webpage, parses it, extracts the content, and then prints the content.
Step 2: Setup OpenAI GPT Model
Firstly, you’ll need to install the OpenAI python client.
pip install openaiNext, you’ll need to set up the API key. This key is usually provided when you sign up for OpenAI’s API service. You can set this up in your environment using:
import openai
openai.api_key = 'your-api-key'
Step 3: Process the User Question and Generate a Response
With the web content and user question, you can then call the API to generate a response. The idea here is to prepend the question with the content of the webpage, which will serve as the context for the model. Then, ask the model to generate a summary or answer based on this context.
def generate_answer(context, question):
    prompt = context + "\n\n" + question
    response = openai.Completion.create(
        engine="text-davinci-002",
        prompt=prompt,
        temperature=0.5,
        max_tokens=150
    )
    return response.choices[0].text.strip()
In this function, context is the content of the webpage, and question is the user’s question.
Step 4: Stitching all of them together
Now that we built a content parser and response generator, it’s time to stitch them together to get our Vina app.
import requests
from bs4 import BeautifulSoup
import openai

# Functions to Fetch and Parse Web Content
def fetch_webpage(url):
    response = requests.get(url)
    return response.text
def parse_webpage(html_content):
    soup = BeautifulSoup(html_content, 'html.parser')
    return soup
def extract_content(soup):
    text = ' '.join(soup.stripped_strings)
    return text
# Function to Generate Answer Using OpenAI GPT-3/GPT-4
def generate_answer(context, question):
    prompt = context + "\n\n" + question
    response = openai.Completion.create(
        engine="text-davinci-002",
        prompt=prompt,
        temperature=0.5,
        max_tokens=150
    )
    return response.choices[0].text.strip()
# Main Function
def main(url, question):
    # Fetch and parse web content
    html_content = fetch_webpage(url)
    soup = parse_webpage(html_content)
    context = extract_content(soup)

    # Set OpenAI API Key
    openai.api_key = 'your-api-key'  # Replace with your actual OpenAI API key
    # Generate and print the answer
    answer = generate_answer(context, question)
    print(answer)
# Execution
if __name__ == '__main__':
    url = input("Enter a URL: ")
    question = input("Enter your question: ")
    main(url, question)

However, I faced 2 major problems. When I ran this code, I came across this error:

InvalidRequestError: This model's maximum context length is 4097 tokens, however you requested 4694 tokens (4544 in your prompt; 150 for the completion). Please reduce your prompt; or completion length.

It means the limit on the maximum number of tokens that the OpenAI API can process in one request is 4097, but my request is 4694 tokens. I had to truncate the request and limit it.

def extract_content(soup):
    text = ' '.join(soup.stripped_strings)
    # Truncate text to fit within token limits
    truncated_text = text[:4096]
    return truncated_text

The second major issue I faced was that the code ChatGPT gave was just returning the question I asked instead of providing an answer for it. It was appending the question at the end of the context, which can lead to such situations where the answer is not as expected.

So, I went back to ChatGPT and shared the error, and it rectified the mistake by modifying the generate_answer function like this:

def generate_answer(context, question):
    prompt = f"{context}\n\n{question}\nAnswer:"
    response = openai.Completion.create(
        engine="text-davinci-002",
        prompt=prompt,
        temperature=0.5,
        max_tokens=150
    )
    return response.choices[0].text.strip()
It just changed the format of my prompts to a Q&A format so that the code can process the question and answer it. Once I updated the code, Vina was able to give me answers to the questions I was asking.
Now, I asked ChatGPT to modify the existing code to answer multiple questions for the given URL, and it changed the code like this:
from flask import Flask, request, render_template, redirect, url_for, session
import requests
from bs4 import BeautifulSoup
import openai

app = Flask(__name__)
app.secret_key = 'your_secret_key'  # Replace with your secret key
# Functions to Fetch and Parse Web Content
def fetch_webpage(url):
    response = requests.get(url)
    return response.text
def parse_webpage(html_content):
    soup = BeautifulSoup(html_content, 'html.parser')
    return soup
def extract_content(soup):
    text = ' '.join(soup.stripped_strings)
    truncated_text = text[:3946]  # Truncate text to fit within token limits
    return truncated_text
# Function to Generate Answer Using OpenAI GPT-3/GPT-4
def generate_answer(context, question):
    prompt = f"{context}\n\n{question}\nAnswer:"
    response = openai.Completion.create(
        engine="text-davinci-002",
        prompt=prompt,
        temperature=0.5,
        max_tokens=150
    )
    return response.choices[0].text.strip()
@app.route('/', methods=['GET', 'POST'])
def index():
    if request.method == 'POST':
        url = request.form.get('url')
        # Fetch and parse web content
        html_content = fetch_webpage(url)
        soup = parse_webpage(html_content)
        context = extract_content(soup)
        session['context'] = context
        return redirect(url_for('ask'))
    return render_template('index.html')
@app.route('/ask', methods=['GET', 'POST'])
def ask():
    if 'context' not in session:
        return redirect(url_for('index'))
    if 'answer' in session:
        answer = session['answer']
        session.pop('answer', None)
    else:
        answer = None
    if request.method == 'POST':
        question = request.form.get('question')
        # Set OpenAI API Key
        openai.api_key = 'your-api-key'  # Replace with your actual OpenAI API key
        # Generate answer
        answer = generate_answer(session['context'], question)
        session['answer'] = answer
        return redirect(url_for('ask'))
    return render_template('ask.html', answer=answer)
if __name__ == '__main__':
    app.run(port=5000, debug=True)
Now all I have to do it to build a front for this code where I can share a URL and ask questions from the URL. So, this is the webpage I created for the Vina tool. I needed two pages- an ‘index’ page where I’ll be feeding the URL and an ‘ask’ page where I’ll be asking my questions and getting my answers.
<!-- index.html -->

<!DOCTYPE html>
<html lang="en">
<head>
    <meta charset="UTF-8">
    <meta name="viewport" content="width=device-width, initial-scale=1.0">
    <title>Web Content QA</title>
    <link href="<https://cdn.jsdelivr.net/npm/bootstrap@5.0.2/dist/css/bootstrap.min.css>" rel="stylesheet">
</head>
<body class="bg-light">
    <div class="container py-5">
        <h1 class="mb-4">Enter URL</h1>
        <form method="POST" action="/">
            <div class="mb-3">
                <input type="url" id="url" name="url" class="form-control" placeholder="<https://example.com>" required>
            </div>
            <button type="submit" class="btn btn-primary">Submit</button>
        </form>
    </div>
</body>
</html>

<!-- ask.html -->

<!DOCTYPE html>
<html lang="en">
<head>
    <meta charset="UTF-8">
    <meta name="viewport" content="width=device-width, initial-scale=1.0">
    <title>Web Content QA</title>
    <link href="<https://cdn.jsdelivr.net/npm/bootstrap@5.0.2/dist/css/bootstrap.min.css>" rel="stylesheet">
</head>
<body class="bg-light">
    <div class="container py-5">
        <h1 class="mb-4">Ask a Question</h1>
        <form method="POST" action="/ask">
            <div class="mb-3">
                <label for="question" class="form-label">Enter Question:</label>
                <input type="text" id="question" name="question" class="form-control" required>
            </div>
            <button type="submit" class="btn btn-primary">Ask</button>
        </form>
        {% if answer %}
        <div class="mt-5">
            <h2>Answer:</h2>
            <p>{{ answer }}</p>
        </div>
        {% endif %}
    </div>
</body>
</html>
Finally, after spending close to 4 hours, this is what the Vina app looks like:
